Category Archives: projects

Aside

We’re in for a blow!

This week has been so busy! My son’s 11th birthday was Saturday so after getting all the laundry caught up, washing the kitchen floor, and baking a birthday angel food cake that flopped out of the pan and all over the counter in a smushed mess when it was turned upside down to cool, and the subsequent Dairy Queen ice cream cake was served at the actual party, I had some time on Sunday to do some research and contemplating and daydreaming. So, while the wind was hurling porch furniture cushions onto the grass in the front yard, here’s what I came up with. 

But, I’m ahead of myself. I actually went into Walmart on Friday – something I haven’t done in a very long time and I bought a magazine and a few  bouncy balls that were 2 for $5. I figured the kids (six of them on our block that play together every day) could throw them around outside and entertain themselves for a few hours while I washed the kitchen floor… again. The magazine was Martha Stewart Living, July 2012 issue. Now, I don’t normally buy magazines anymore, either, but this one had a picture of S’mores on the front with a note to the side that said “the s’more upgrade (yes, it’s possible)” and I had to read exactly HOW this was possible.
On Sunday, I actually had time to sit and read. Of course the whole magazine, more or less, is about the 4th of July and the celebrations that go along with the holiday. Recipe’s for lobster bakes, chilled soups, cute table arrangements and settings. The home made graham crackers look pretty fabulous, too, but I haven’t tried them yet.
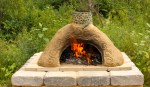
There’s an article in there about a couple that bought an old camp in Wisconsin and turned around while saving the integrity of the era in which it had thrived. The camp is called “Wandawega Lake Resort” (Google it! You’ll love it! I don’t know how to add a link to it yet, sorry.) and it is charming!  A tire swing, a tent hill, a few cabins, tennis court, horseshoe pit, shuffle board, archery range, the whole nine yards. All set up to enjoy the leisure time of camp. I began wondering how difficult it would be to create a spot like this, with the feelings it conjures of a time when we were kids, enjoying all that summer offers, at the farm. I thought about the corner of our field by the old apple tree, selectively cleared out, it could host a few scout tents and a camp fire pit. A 12′ circle mowed in the field, cropped close to the ground like a golf green to play giant marbles with a dozen or so bouncy balls. A craft cabin for rainy days where wind chimes, tree bark canoes, dogwood baskets, dream catchers and leather arts could be created. A tether ball, and archery range. An outdoor kitchen and picnic tables for group events. And maybe, just maybe a huge free standing fireplace with an enormous hearth down by the pond for winter skating parties. (well, maybe that last one could take a few years)
A Canada Day weekend at our place could turn into an annual event filled with good friends, tons of kids, campfires and s’mores! This thought makes me smile with my soul, as the sky opens up and washes my cushions down the street.

Daydreaming up a storm….

The Wedding

Standard

So I haven’t posted anything about the wedding yet.
I had hoped we would be able to have it at the farm, outside, with guests perched on quilt covered hay bales on either side of a petal covered isle, leading to an alter, with an officiant covered in white robes….but we are still miles away from having comfortable spots for guests to sleep, as well as a decent place to cook for more than 10 people. Wouldn’t it be grand, though, to have some kind of celebration there for our tenth anniversary? Maybe that will have to do.

Enter Loreto Aprutino – A tiny town in Italy, only 30 kilometres from the coast, and roughly 2 hours from Rome, is the magical spot chosen for our wedding.
The bride will be dressed, unconventionally, in fuschia and white with white peony’s and a modest veil; the groom in (of course…) an italian suit, looking every bit the Sean Connery stunt double. There will be photo’s taken outside the town hall, and on the beach and in the cafe and ….. and…. and…. yes, there will be photo’s!
In just under a month, I’ll be there, with my sweetie and my world will begin again. A new chapter that I am excited to read in this book I can’t put down.

After our trip, we’ll be getting ready for our journey east once more. Back to the farm for the summer. Building fences, enriching soil, mapping future pastures and starting construction on the house.
I have been making lists for weeks now, and have narrowed down the tasks at hand, counting back from departure date to now, the things that need to be done. My plate is full, but I like it that way. I can feel the bubbling anticipation and it’s hard to sleep.
Tomorrow is Easter. I have an easy plan for the day. A drive in the country, toss around a glider in the park, pizza and a movie, then sleep. Monday the countdown begins. I’m ready.

I miss my tractor…..

Standard

1951 Ferguson Tractor - the pre-curser to the Massey Ferguson. Man oh Man, I love this tractor!

How is it possible that this born and bred city girl misses her tractor?
I have only used it maybe a dozen times, constant learning curve, all the while my stupidly long legs – the right one specifically – having to bend in weird angles to get the extra stiff clutch to move. Yes, it is a bit of a pain to drive – but WOW! is it beautiful!

It’s home is in New Brunswick, and until the move, I am in Alberta, biding my time, researching all that can be researched about farm animals and growing things. The weather here has been beautiful. The ground is thawing and the buds are on the trees. In New Brunswick it has been about 10 degrees warmer with rain and things turning green. If I were there, I’d have started seeds in the as-yet-to-be-built greenhouse, ordered saplings for planting along the road, and started on barnyard fencing. My beautiful tractor would have started the season with a tune-up and a drive around the fields.

Now, I know that “beautiful” isn’t what farming is based on. I also know that you can produce perfectly respectable, wholesome, natural, GMO free, additive free, hormone free, organic food with an ugly tractor…. or no tractor. But the fortunate opportunity to be able to choose a beautiful tractor to help with the occasional tilling or plowing or pulling before we have found a willing draft horse, presented itself two years ago. I didn’t know the first thing about tractors, but as usual, my gut served me well. I bought it, and the lovely farmer who restored it delivered it to our farm the following evening. Parked it right in the field so I could practice a while before it got dark. He even put some gas in it for me.

This Ferguson has been lovingly restored. It runs beautifully and has been cared-for well. Last summer, we used it to till up the market garden. It was to be 100’x100′ but after 3 hours and some (make that a lot) extremely large rocks were hit by the tiller, and didn’t even budge but had huge gashes in the sides of them along one side of the garden – I decided to be happy with 100′ x 50′ for the first few years. Then I will expand in another direction to save my tiller.

So, as mentioned the tilling took three hours. The rock pulling took three days. I told my son he could make a nickel for every rock he pulled out of there that was bigger than his outstretched hand. It was a hot few days and he worked and worked until I owed him $30.00! I figured, after that, what rocks were in there, could stay in there.

I really think I may be growing rocks. Hope there’s a market for them.


This tractor may help with putting a fence around this market garden. It has a three point hitch and power take-off. I hear there is a power auger that can hook up and dig post holes. It will help with delivering manure from the far side of the barn to the compost heap, then from seasoned compost heap to the garden bins where it will be stored until used. It may even help haul some of the harvest from the pumpkin patch. It may be used for hay rides in the summer, tours of the farm, to bring bales to animals or haul water to the pigs in the lower pasture. It will save my back and help me complete work a whole lot faster.

So although it is a beautiful tractor, it’s not just another pretty face.

Corn brooms

Standard

I have already acquired heirloom varieties several hard to find vegetable seeds and will germinate some this summer to see if they are viable, and save this years seeds to plant next year. I have read that heirloom seeds (depending on the species) can last up to three years and still be viable, but I have actually experimented with several seeds over five years old and still had more than a 50% germination rate. Some of my seeds are quite rare, though, so I don’t want to mess with best before dates and risk losing them entirely. Once I get to the farm this year, I will do a complete inventory of seeds and figure out what needs to be added.

Earlier in the year I spoke to a man in Colorado who has several pounds of broom corn seeds that he wants to trade for a seabuckthorn tree. I have to admit, I was tempted to send him one in trade for the broom corn but didn’t because I know across border shipping can be tricky and I wasn’t so sure he wanted me to get into the paperwork for exporting live trees. I thought it would be less fun, but more practical to just purchase broom corn seed.
I have a homemade corn broom that I love and thought I might try my hand at making a few more. If I understand it correctly, you plant the broom corn (Sorghum vulgare) and the seeds grow at the end of some pretty sturdy stocks. You cut the stocks, remove the seeds and bind the stiff grass type stock with twine to make your broom. Check out Youtube for how to make corn brooms.
The broom corn comes in a variety of colours, too, so you can make some really pretty, natural brooms.
Here is a picture of mine in its’ spot in our little guest house…

Farm name chosen !

Standard

Bouncing about with farm names for the last few years now, and it turns out we have one that works. CLOVER HILL HERITAGE FARM specializing in heirloom varieties and heritage breeds.
I like the feel of that. So when we have our goat herd or our sheep flock they will be registered to our farms name when born. A baby goat born at our farm will be named, for instance, Clover Hill Adam (if we are having our “A” year) or Clover Hill Zola (once we’ve been doing it for 26 generations). Some farms do it this way to easily keep track of the year a goat was born. I don’t know if there is another reason for it – there may very well be – but I suppose I will find out soon enough.
Our huge field (about 30 acres) along side our driveway heading up to where the house will be is covered in timothy grass and red clover. In early June, when all is in flower, the scent is intoxicating. And although that field won’t always be in clover, we will have it planted somewhere because our own clover, timothy and other grasses will be baled for winter feed for years to come, I’m sure.

Getting on with it…

Standard
Getting on with it…

The first few projects had some snags, but in the end, with trial and several errors, have worked out quite well. First – the adobe oven.

This was the first attempt at building a structure of this type and although there was some pretty heavy lifting, it wasn’t hard to do. We discovered three huge rock piles on the property. Two of them are on the other side of the road, but one is right here by our big field. Farmers have been pulling rocks from this field for many, many years and I don’t think we are done. This field, as many others do, seem to grow rocks like potatoes. I figured it was good to use some of those.
First, the base is made by stacking 4″x 4″x 4′ posts in a square on a fairly level base of gravel. I drilled holes in the corners and stuck some re-bar in there to hold it steady for the next step. I made our 3.5′ high because we are tall people – you may want to make yours shorter. The thinking is, when you spend three plus hours heating it up for use, you may want to use it for several baking projects, like breads first, then pies and pastries, then roasting meat and vegetables as the oven cools some. So if you are using the oven all day, you don’t want to be bending over to use it. Keep this in mind when building yours.
Then we filled it full of large rocks – the ones we found in our pile. Some of those were as big as my head! So this is where the heavy lifting came in. Luckily we didn’t have to cart them far, just into my wheelbarrow type trailer that attaches to my little tractor and then out again at the oven site.
Then we got out our shovels to cover the bin of rocks with dirt. We used twigs to poke down between the rocks to make sure it was shifting all the way to the bottom and just kept adding dirt until we felt it was sturdy.
Next, after making sure it was pretty level (Rob hates it when I tell him I ‘eyeballed it’!) we covered it with a layer of sand to make a flat surface to lay the bricks. We chose heavy flagstone for our first layer. Then another layer of sand, mostly to fill in the cracks and prevent any shifting. We dusted the top with more sand to give some security to our firebricks that come next.

Base with the top layer of fire brick on - ready for our sand form

Then came our sand form.
The sand form is needed to support the clay walls while the clay is wet. I made this sand form a little small for what I wanted, but at the time it looked almost too big. The sand is quite wet – a little wetter than you would use for a sand castle at the beach – only because you need it to get tall and the wet helps that.

Sand form for adobe oven


The sand form is then covered with newspaper. This is not really necessary for the structure, but it sure does help when it comes time to hollow out the sand. You stop scooping out sand when you reach the newspaper. It is also not necessary to remove the paper as it will burn off in the initial fire. Another tip: it is much easier to cover it with wet newspaper. The dry will fly off in the slightest breeze and make layering it next to impossible.
Now you have a good solid base for the clay.
Our soil has a high clay content so using our clay was a no brainer to me. It stuck together well when moist and I initially thought there was enough sand in it to prevent cracking during the drying process. Turns out I was wrong about that, but the clay was terrific! Next time, I will mix 1 part sand to two parts of our soil and it should solve the cracking problem. A few of our drying cracks were just superficial and not at all harmful to the structure of the oven itself, but two of them were quite significant. These two had smoke coming out of them. Also, after having a few curing fires in this lovely oven, I have decided that the walls aren’t nearly thick enough. They are roughly three inches thick and I believe four and a half would work much better. The walls need to be thick to hold on to the heat for hours at a time. Mine are cooling too quickly, making a constant temperature inside the oven somewhat of a pipe-dream.

There are two of these cracks that threaten the integrity of the oven


Anyway, I’ve gotten ahead of myself. The clay we used was mixed with a three gallon bucket of straw cut up into finger lengths to help bind it together after it dries, then with enough water to make it like mud. It felt really good to get in there with my feet to mix it around, but not as effective as using a shovel and turning each scoop back into the pile.
I added the clay to the base starting at the bottom and working up. I made sure the first layer had lots of texture so that the second layer would have something to grab onto. Three layers later, I cut out the door. This is our final view before I hollowed out the sand.

Decorations attached

Now with the sand still in there, I let it dry for three days with a tarp over it to prevent sun from beating down and evaporating the water to fast. Then hollowed it out and another three days of drying under a tarp. The cracks were really tiny then and I tried to patch them before we lit our first fire. Unfortunately, they were too severe and shrunk up a bunch to make these large cracks. The cracks didn’t effect the size of the fire, though. It burned beautifully!

Nice fire!

So, to recap, I loved the process of building this fire. I am either going to tear it down and build another, taller, with more sand in it and thicker walls, or I will repair this one. I am thrilled with the way the inner walls turn a lovely terracotta pink after a few fires. I will, either way, be building more adobe ovens, and will definitely be baking bread in them.

Beginnings….

Standard
Beginnings….

Wild Lupins

Five weeks I have been here at the farm and five weeks I have been working non-stop from early morning until almost dark – until my legs give out and my soul is tired.
“So much to do, so little time” my father use to say. Never have these words been so true to me.
We arrived on the 26th of July. We took a brief look around the farm to check for growth and map out a spot for the trailer to go once we pulled it from the workshop. We checked out the progress on the barn and then left for the nearest Best Western.
We were tired then – after nine days on the road, most of them through flooding in North Dakota, Minnesota, and Wisconsin, and with a ten year old boy tired of sitting in a car.
The dog was the optimal traveller. She kept quiet just inside the hatch – slept most of the way and ran around gas station green belts in brief spurts before surrendering to the heat in the Kia for another long haul. The occasional Milk Bone seemed to make the trip bearable.
Once we were here, though, our juices began to flow again. We breathed with more determination and spirits lifted.
Set up took much longer than any of us anticipated. New equipment needed to be assembled and inevitably tested before we could get started on the mountain of work to be done.
This part is the most frustrating in any new enterprise and my advise to those in the planning stages of anything of this nature is to wait before inviting company to join in the “FUN”.
We had a bunch of family “helpers” join us during the first weeks of our arrival. We purchased the land four years ago, but this is the first year there is both water and power, making visitors more comfortable and work a lot easier. However, learning our new vocation and how to operate its necessary equipment is unquestionably easier to do without an audience. No matter how eager to help and patiently they await direction, it can be very frustrating for them, as well, when you haven’t the first clue how to start a project until you get in there and try it yourself.
That said, it was gloriously busy and in many cases easier to have someone laugh with you at the end of the day.

Travelling with…..

Standard

The date is closing in and I have much to do. My sweetie has finished the trailer walls just in time for several days of rain. We will have to wait for a dry day or two before we start loading.

I have made list upon list of things to take. 1. The 3 gallon antique butter churn with a crank on the side and a spigot to drain buttermilk (will likely be a while before I make that much butter but it was available at a great price and I will use it before market days!) 2. The hammock and banjo for my sweetie to finally relax after so many months of days too long, missing supper, and working weekends. 3. A bed and dresser for the little guesthouse. 4.The bedding, 5. window panels, 6. rug, 7. wash-basin and 8. water pitcher & chamber pot. Yup, that’s right, chamber pot!

Then there is all the equipment acquired in the last few months for jobs at the farm. The chipper for twigs up to 8″ diameter (if you can believe it) and the log splitter!

Yup, that trailer is going to be holding some pretty valuable stuff. Not monetarily, though I suspect it would be expensive to replace, but in “necessary to the goal” and “make my life sooooo much easier” categories, invaluable.

I am sad to report that my travel companion – G – is not able to join me this trip. On the up side, she has landed a wonderful job that she loves and is gaining fantastic experience while making pretty decent coin!  So as sad as I am to not have her with me this summer, I am thrilled for her and look forward to perhaps having the pleasure of her company next year instead.

On that note… meet my new travel companion… Ella

Three feet at the shoulder, she is not fully grown yet. She thinks she is a lap dog.

Ella is our great dane. Surprisingly sweet and gentle unless you show no fear and wrestle with her. Then she will lay you flat with one stroke of her paw. She allows little kids to pull on her tongue and count her teeth, ever so slowly, while she keeps her jaws apart and her mouth dries up, she waits….. till they are done….. which sometimes takes a very… very… long time.  She is a darling dog and a very good traveller. I shall be lucky to have her for company.

My first quilt.

Standard

I have been doing a little poking around on websites and blogs about farms that have started to use their places as destinations for weddings or other functions.  This idea appeals to me because I have some event planning background that I enjoyed and because you can’t beat one more income generating avenue open to you.

I saw a photo during my recent poking, of a hayfield with square bales set up on either side of a wide isle. The bales had homemade quilts thrown over them for the guests to sit and at the end of the wide isle was an arbour and alter for the wedding ceremony.  I loved this photo. I loved this idea. The country, homey, casual atmosphere seemed perfect for an occasion held at the farm.

So, from there I started thinking about other considerations for hosting such an event. Where do your guests sleep?  What are the logistics for feeding a large group? Where and on what dinnerware? Entertainment?

I have a few places for guests to sleep this summer.  A small guest house will keep two comfortably, our travel trailer can sleep up to 12, but not that comfortably. The barn will be completed likely the first week of July and will have hot and cold running water as well as electricity, so we could set up a bunkhouse situation in there since we don’t have animals. Then there are always tents. I love tents. Not the nylon modern dome type but the safari canvas variety!! How romantic to see unbleached cotton canvas dotting the field with small campfires in front of them like a little gypsy village! Yes, that is more like it.

As far as dining is concerned, I figured pint sized mason jars will work nicely as beverage containers. I will need hundreds of them to put up food for winters, and they may as well double as ginger beer vessels until they are needed for their primary purpose.  Dinner plates and flatware, along with banquet tables, may be the things we need to rent for large parties, but if it turns out we are going to have a lot of them, I have found some great websites for wholesale or case-lot sales. The VV boutique for unmatched dinner plates is also a reasonable option.

Then we set up banquet tables, use the same bales with quilts for the seats and all that is left is the bountiful meal!

Our adobe oven should be big enough to handle a few roasts. If it can bake 16 loaves of bread at a time, beef and chicken should be a breeze. Huge vegetable salads and a campfire with a big kettle for ear corn; potatoes, boiled, baked or roasted in with the meats and we will have a feast fit for royalty!

From there it isn’t hard to imagine lanterns being lit, a few guitars and a banjo strumming, maybe a fiddle playing. The bales are moved to the outside and the dancing continues into the night.

Yup. That’s how it should go, and this was the original inspiration for my first quilt.

We have friends getting married in the middle of June. Coming up with the perfect wedding gift for these two was no more difficult than seeing that picture. A wedding with quilts, the very symbol of home and a life spent together in love embodied in that cozy home-made textile.  So I headed to the fabric store.

planning stage

I love green, so I loved all these fabrics. Okay it might be a bit girly, but I thought the colours were rich enough to pull it off.

All wrapped up with a ribbon to give away to the happy couple

I have to admit, I have caught the quilt making bug. Next time I may try a pattern, since I think I made it a little harder on myself designing as well as sewing. Trial and error, mostly error, dictates that I not try to reinvent the wheel every time I try something new… or maybe I will do it exactly as I did this time, but with a little experience under my belt.

Bottom line is this quilt turned out okay and it was made with an original design, some pretty, complimentary fabrics and a whole lot of love so I will view it as a resounding success and try it again.

Wide open spaces…. fenced.

Standard

I have been in the planning stages of this sustainable farm for about four years now.
It sounds like a long time, but it isn’t, not really, considering we started with an empty piece of land. A charming, rolling hills, lush forest, creek at the ends and pond in the almost middle, but empty piece of land.

There was a well to dig, a road to build, a place for chickens to live for a summer, and then the big stuff. The workshop, the barn, a permanent chicken coop, and a movable shelter for goats and sheep all had to come, eventually, to this empty bit of land.
I admit, as I write this, it sounds like it’s going to clutter the place up hideously!
That’s where the planning comes in.

For a city girl, it was initially an enormous concept to grasp. My mind nearly exploded with really big ideas. We’ll have cows, and lama’s, goats, sheep, pigs, turkeys, ducks, geese, peahens, and peacocks! Maybe we can raise Reindeer or Buffalo!! But as with all really big ideas, the reality check comes right away and kicks me in the butt.

So the city girl got herself some books.

I have gardened, organically, for my whole life. I knew I could do that. And for the first time could make a garden as big as I could handle, which I knew also meant it would get bigger than I could handle at least once. What a thrill to be able to spread out to have a vegetable garden AND a flower garden and not try to smudge them all into the same over-crowded-to-the-point-of-stunting garden plot. My dream! Or at least half of it.

The rest of it will come with the animals, I know, but the preparation started four years ago. There are fences that need to be built. Lots and lots of fences. I bought a book on fences. The decision seems to boil down to a. do I want to lay my money down now for a really good sturdy fence that suits its purpose and won’t blow over or be pushed over by an aggressive goat, and will keep out predators while keeping safe our animals? Or b. do I want to spend a little now, experiment with electricity and know that occasionally I will have to chase a hog or goat over hill and dale to bring it back home where I will have to repair said fence? I’m liking “a”.
I guess the upside to the latter is that I can also experiment with where the fence goes. I can start small and grow a pasture as my flock grows. So, more accurately, I’m liking “a” with a bit of “b”.

It makes sense to me to build a fence that is secure for our largest animal, and will also work to contain and keep safe our smallest animal.
Goats need a high fence. They jump. They climb on things and then jump from there.
The ideal fence for a goat is six feet tall, woven wire with sturdy sunken posts about every twelve feet. If you have dwarf goats, the fence only needs to be about five feet tall but for the occasional olympic qualifying goat, I figure six feet won’t be a waste. Also, we may decide to offer a very nice retirement for a few draft horses and while they don’t require the woven wire, a high fence couldn’t hurt.

The woven wire fence will also be ideal for turkeys and chickens to free range. They keep out predators very well and the birds can cover more territory for bugs and grass, making for very happy turkeys and chickens.

The combination of fences will come in with the hogs. There are a few very old apple trees just up from the pond where the forest has been over-growing for about ten years. This would be an ideal spot for hogs but difficult to fence since there is so much brush at the base of the large trees. Hogs love shade and they love to dig for roots and, you guessed it, apples! The apples on these trees are about forty feet up so I won’t ever pick them, but the pigs would love to find apples dropping at their feet. This area has some low areas, which would be great for mud, but also high areas to keep them dry and warm when they want. A pig house on the edge of the back woods would make it far enough from the road and neighbors so as not to bother, and ideal for the pigs in any weather. A large band electric fence is visible to the pigs poor eyesight and is portable enough to move their pen as the ground is worked over. Fresh pasture can be as simple as moving a few stakes every week or two. Combined with the permanent fences surrounding large pastures, this should work nicely!